Part 1 here or http://mariesegal.blogspot.com/2011/03/african-trade-beads-part-1.html
Favecraft link here http://mariesegal.blogspot.com/2011/03/fave-crafts-blog-hop-march-15th.html I messed up and posted the wrong link 😦
Well, the 1st cane is made and you need something to do with that cane, so I am going to give you a couple of simple beads to play with now.
You will need:
Clay slicing blade
Needle tool
Bamboo skewer
1st Bead
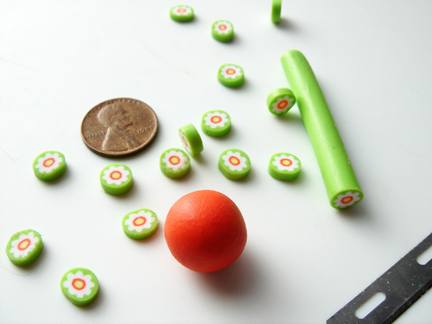
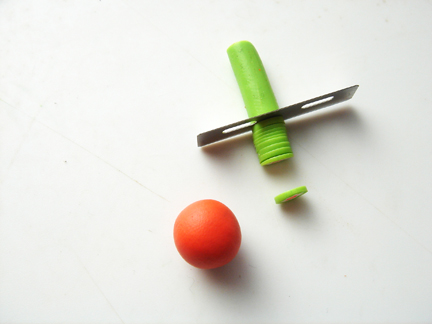
You will need a ball of red clay mix, you can find that on part 1.
The ball of red clay is about 3/4″ or a little smaller.
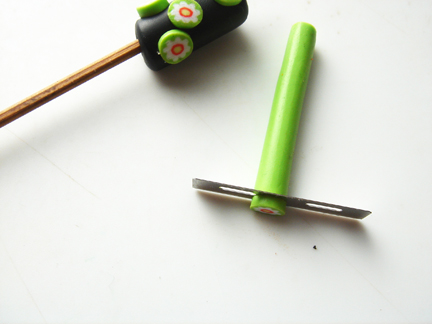
Roll a 2″ length of the cane you made in to a 3/8″ coil and slice off little pieces. These are about 1/16″ in thickness.

Place six slices around the center of the ball, leaving a small space between each slice and the next.
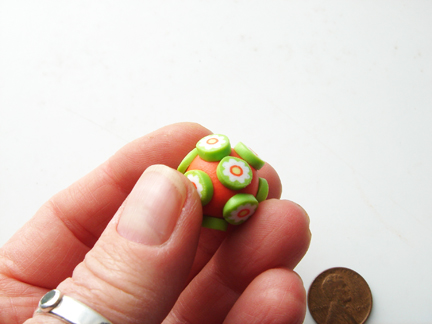
Place three slices on the top and three below the center slices.
The ball will pretty much be covered with slices.

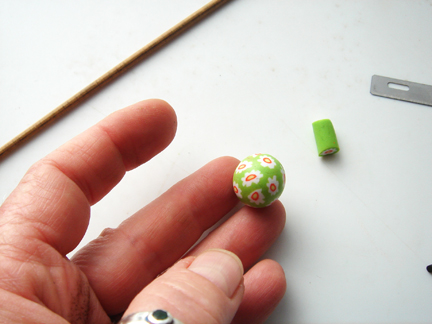
Roll the ball with slices gently at first and the a little more rapidly in to a ball.
I like to leave the lines in the beads between the slices and the backgrounds, it looks more like the real African trade beads made out of glass.
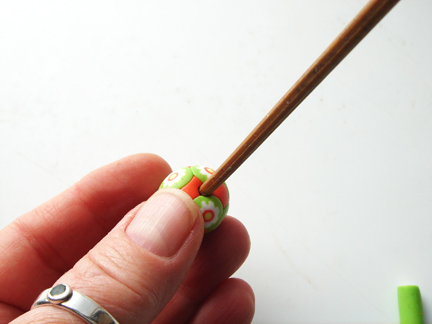
Pierce with your bamboo skewer by drilling in to one side. And drill the skewer out and drilling through the hole on the other side.
2nd Bead

Using a ball of black clay the same size as the one for the bead above. Roll it in to a ball and then roll in to a 1″coil.
Pierce with a bamboo skewer by drilling through one side and when the tip shows a little, drill it out of the bead.
Then drill through the other side and the same hole.

Using the same size slices add two at a time to the bead and then add two right next to that row but in the spaces between the other slices.
Stagger the slices in this pattern all the way around the bead.
I leave the bead on the skewer so I do not distort the hole or the bead.

Once covered with slices roll the bead on the skewer on the work surface to smooth a little. Leave the slices raised from the surface of the black core.

With the clay blade roll the bead and the blade forward away from you at the same time and cut off the ends of the bead for a straight edge on each side.
Bake the bead on one of the ends on a piece of cardboard.This way there is no shiny spot on the bead.
Cardboard is the same texture as the baked clay.
3rd Bead
Using a smaller piece of red clay than the first bead and thinner slices.
Place the slices as close as you can get them to each other.
Place the slices all over the surface of the red ball and then gently roll the bead at first and then roll a little faster and with more pressure from your palms.
I roll this bead until the surface is smooth with no lines from the slices showing.

Roll this ball in to a teardrop.

Flatten the thick end of the teardrop with your forefinger and thumb. It will be about 1/4″ thick.

Use a bamboo skewer to make an indentation in the thick end of the teardrop to form the lobes of the heart.
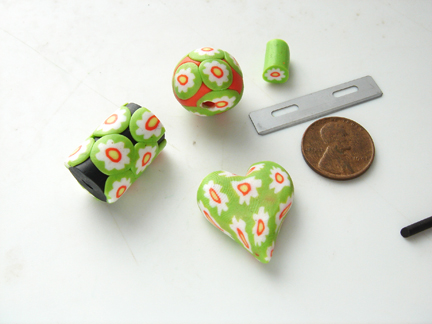
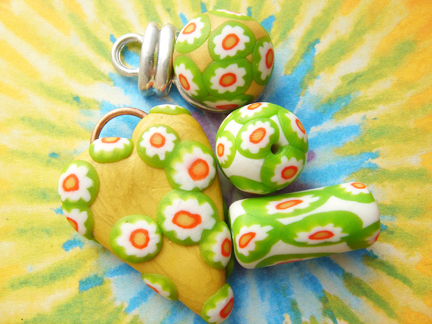
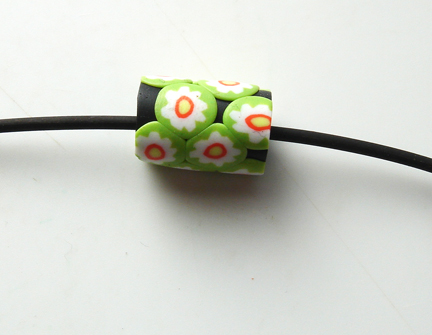
Here are the beads so far, I have one more to show you.
4th Bead
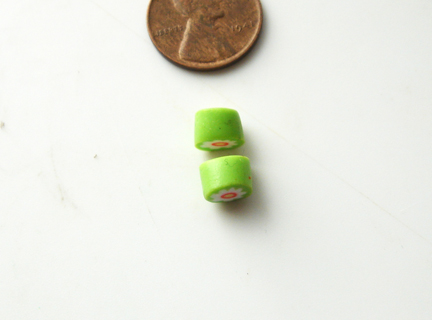
This bead can be used as a little spacer or for a bead itself.
Slice the cane slices as thick as the diameter of the cane rod.

Using the head pins poke holes in the beads by drilling the head pin through the slice.
Bake all of the beads on a piece of cardboard in a 275 degree F. pre-heated oven for 30 minutes. Shut off the oven and let the beads cool in the oven until you can touch them or place them hot out of the oven in other to a bowl of ice water to cool.
Next, a cane pattern???


1 Response to “African Trade Beads- part 2”